
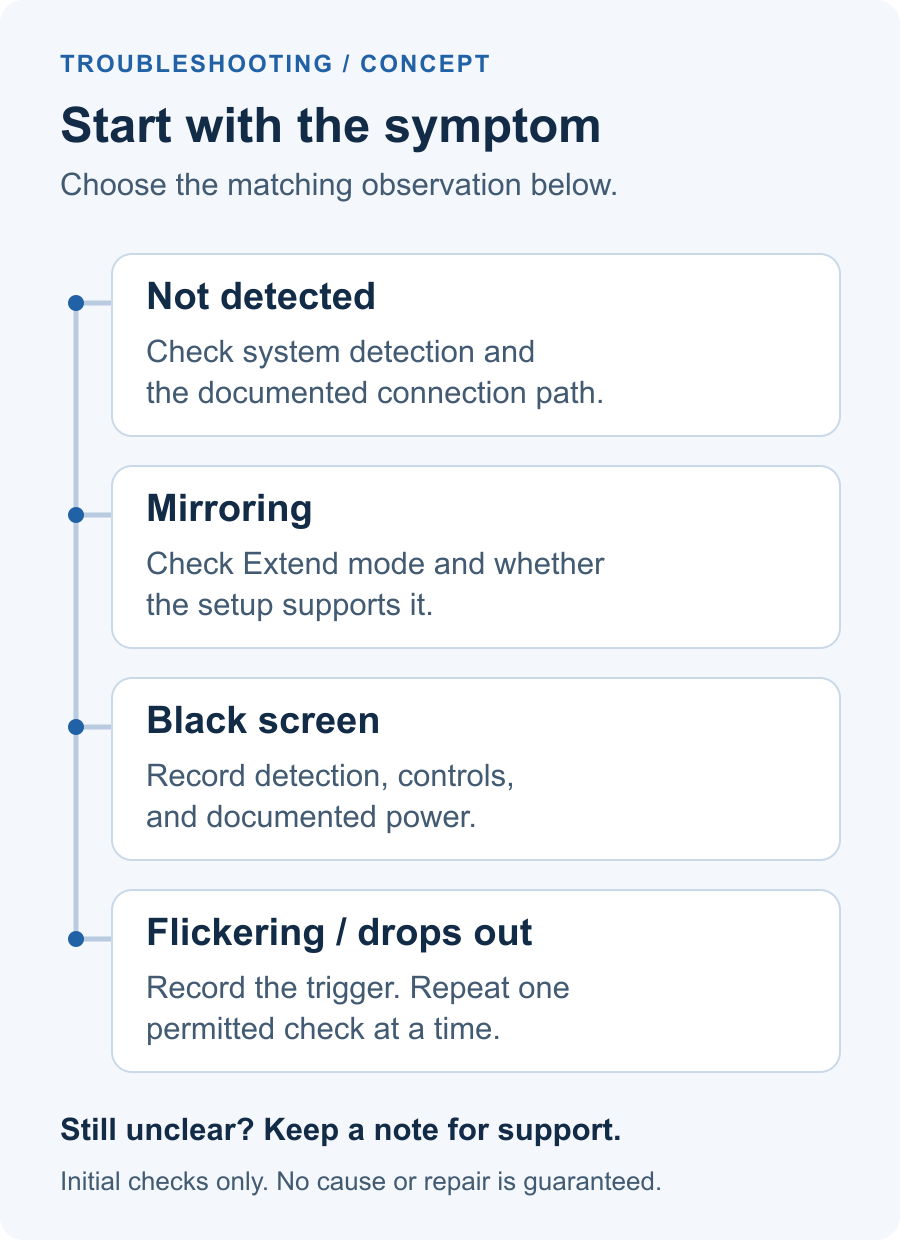
“Not working” can mean a missing display, duplicated content, a dark panel, or an image that repeatedly drops out. Those observations call for different checks. Start by naming what you see, then change one thing at a time.
Save your work before reconnecting equipment or restarting. Keep the product's setup instructions available and record whether this is a first-time setup or a previously working arrangement. The aim is a useful initial diagnosis and support handoff, not a guaranteed repair.
Identify the symptom and the connection path
Open Settings → System → Display in Windows, or Apple menu → System Settings → Displays on a current Mac. Note whether the affected display appears there. Older macOS versions may use System Preferences.
| Observation | Start here |
|---|---|
| The affected display is absent from system settings | Not detected |
| Moving a window produces the same movement on both screens | Mirroring instead of extending |
| A panel is dark, whether or not the system lists it | Black screen; also follow detection checks if absent |
| The picture flashes, cuts out, or repeatedly returns | Flickering or intermittent image |
Matching wallpapers alone do not establish mirroring. Also record whether one panel or every external panel is affected; a multi-panel extender need not fail as a single unit.
Next, identify the product's documented display path. Native video uses a supported video output and connection chain. USB graphics relies on the product's specified software as part of the display path. A USB-C connector's shape does not tell you which method applies.
If the instructions describe different connection paths for different panels, record the path used by the affected panel. Do not assume that every screen in the arrangement uses the same route.
Use the instructions for the actual product and connection. Native-video adapter requirements are not a universal checklist for USB graphics, and a generic graphics-driver tutorial is not a substitute for the extender manufacturer's software instructions.
If the laptop screen extender is not detected
Check that the specified cables are secure at their intended ports. Check display power against the product instructions. Keep laptop charging and display power separate in your notes; one does not establish the other.
If the instructions permit an alternative cable or direct connection, test that supported alternative and check detection again. Do not remove a required adapter, substitute an arbitrary cable, or rewire a multi-panel product merely to imitate another monitor's setup.
Microsoft's external-monitor troubleshooting guide includes connection and cable checks. Apply them within your product's supported path. If trying a second computer is appropriate, first establish that it meets the product requirements; a failed attempt on an unverified computer is inconclusive.
On a Mac, open Displays, hold Option, and select Detect Displays. Apple documents this in its dark-display troubleshooting guidance. If the display remains absent, record that result and move to the software or support check rather than repeatedly rearranging detected screens.
If it mirrors instead of extending
In Windows, press Windows key + P and select Extend. Recheck with a movable ordinary window, leaving different content on the laptop and external screen. Microsoft recommends checking this mode during external-monitor setup.
On a Mac, review the selected display's mirroring or extension setting in Displays using the instructions for your macOS version. Apple's display-connection guide identifies where to access display settings.
If independent displays still cannot be selected, confirm whether the product and connection support that arrangement. Microsoft notes that a splitter duplicating one video signal does not create independent outputs. Do not assume every adapter, dock, or USB graphics product behaves like that splitter. Mode selection also does not settle physical screen arrangement or main-display choice.
If the panel is black
Record whether the system lists the panel and whether its own controls or status indicators respond. Where the product provides brightness controls, check them using its instructions. Apple notes that non-Apple displays may require their built-in controls.
Recheck the documented power and display connections. A dark panel alone does not identify a failed cable, insufficient power, or defective hardware. Avoid choosing another power supply from its wattage label without product-specific confirmation.
On a Mac, also note whether macOS asked you to allow the display or accessory to connect. Apple explains that an unapproved accessory connection can leave a display dark. If approval is blocked on a managed Mac, involve IT rather than changing security settings to complete a check.
For a native-video connection, compare the complete arrangement with the computer's supported display count, resolution, and refresh-rate limits. Apple's guidance makes these checks model-specific. For USB graphics, establish the separate product and software requirements with its manufacturer; do not transplant native-video limits into an unsupported conclusion about that path.
If the picture flickers or drops out
Write down the trigger: immediately after connection, after waking, following a settings change, or during ordinary use. Note which panel is affected and whether it disappears from system settings during the interruption.
Repeat the permitted cable and connection checks, changing only one item. If the symptom began after a display-setting change, return to a previously documented supported setting when possible. Record whether the symptom repeats under the same conditions.
These observations help narrow the question; they do not prove the cause. Stop repeatedly disturbing an unstable connection, and ask product support for the next appropriate check rather than treating flicker as proof that a new charger or driver will fix it.
Check software through the product's official route
If the manufacturer requires a USB graphics driver or application, confirm its name, installed version, and compatibility instructions through the product's official support or download route. Keep this distinct from the computer's graphics-adapter driver.
Record relevant OS or software changes, especially if the setup previously worked. Driver removal, rollback, firmware changes, and permissions need instructions appropriate to that product and computer. On a managed laptop, stop at an installation or permission restriction and involve IT. Do not bypass its controls.
Record the result and know when to stop
Complete this support note with observations rather than guesses:
- Computer and OS: exact model, processor/chip where relevant, OS version, and whether the laptop lid was open or closed when the symptom occurred.
- Extender and symptom: model, affected panel, system detection status, first occurrence.
- Connection: ports, cables, dock/adapters, and the affected panel's native-video or USB-graphics path—or unconfirmed.
- Power: how each device is connected, following its instructions.
- Software and permissions: required product software and known version; any accessory-approval prompt or blocked step.
- Checks: one change per entry, result, and whether the symptom returned.
- Open question: the next product-specific instruction you need.
Stop after the applicable initial checks if the path remains unclear, the issue persists, or the next step requires unsupported hardware or software changes. Give the note to product support or IT. If the picture returns, verify the intended independent-window behavior and record the conditions that worked; an initial success does not establish every mode or application.
For a GemScreen setup, check the product’s own instructions and the documented connection path for your computer. View GemScreen product details.


コメントを書く
このサイトはhCaptchaによって保護されており、hCaptchaプライバシーポリシーおよび利用規約が適用されます。